This is the start of the Devlog for our real-time-strategy game with the codename “ProjectA”. It is inspired by strategy games like the Anno series, Warcraft, Empire Earth and Age of Empires. We will update you in more or less regular intervals about the progress on the game, our next steps, occuring problems and sneak peeks from behind the scenes.
Keep in mind that we have some good ideas where we want to go, but there is still much room to change things as we see fit. Some aspects may be thrown out the window in the future and new things will be added to the list instead.
Starting with the base setup for the development:
- The game will be created in the Unity game engine.
- Planned to release on Steam
- Will be multiplayer using the networking library Mirror for Unity, with one player being the host and the others joining into the lobby
The rough idea of the game will be that each player starts on an island where they have to establish their own settlement by trying to develop their units and buildings, maintaining the needs and costs for each of them. There will be an upgrade system akin Anno 1800, where you will keep increasing the level of your buildings so that newer and better workers will join your settlement. The new settlers will have other needs that are harder to maintain.
Players will also have the opportunity to fight each other, by building an army and battling it out either on sea or on ground (not yet sure about any flying units). To keep your army fed you will need to conquer other islands while trying to keep your main island defended.
In later stages of the development there we will also tackle the AI part of such a game, however we will focus on having a game that you can play with others first, as the artificial intelligence is a whole nother beast to deal with.
We started this devlog after we had already created a good foundation project. Following we will show a few things from Version 0.1 and Version 0.2 with some screenshots. We of course cant show every little detail from “behind the scenes” and some things are surely skipped, but we hope this will give some good insights on our progress
Version 0.1
Story / Concept
Having a foundation for the story of the game is very important for the definition of buildings and units. At a later time we will release more information on this topic. To summarize it quickly, we tried to create a suitable universe for our game to take place in. This follows the tips and rules of world building and story telling like it is shown in the “185 Tips on World Building” by Randy Ellefson. Furthermore we started to block out some basic buildings which allowed us to create a rough scaling guide for further modeling and world building.
Lobby System
To start the game development we created the basic lobby system with Mirror. This was very much inspired by a course by GameDev.tv on Udemy (which is sadly no longer available to enroll in)
When starting the game you will be asked if you want to host a lobby or join a lobby on a very basic starting screen.
The lobby looks like this:
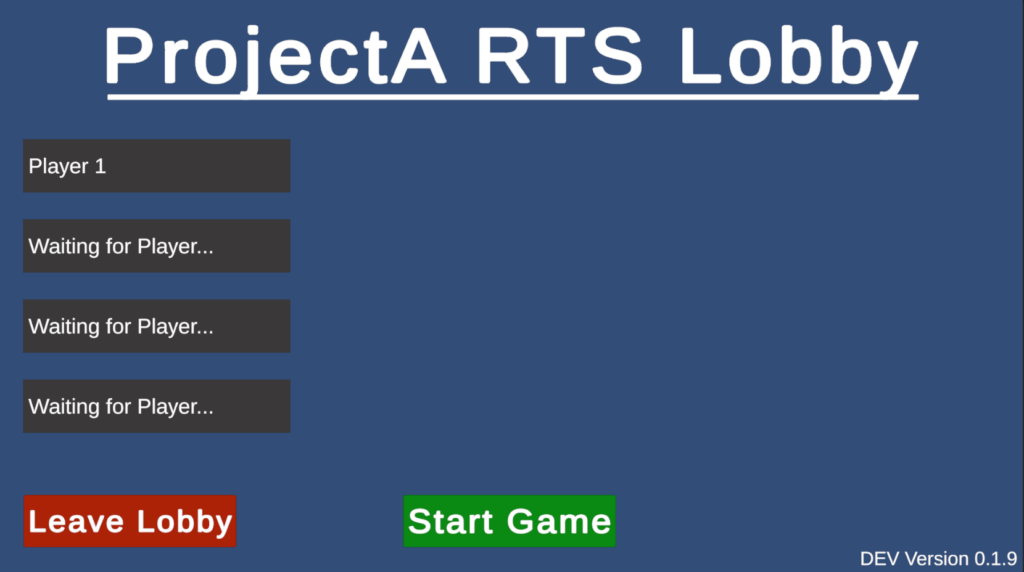
Currently the names are just placeholder, but later will be requested from steam or edited by the player themself if they chose to do so. As this is still in the very early stages, the steam support is not completely implemented yet, however the framework for it is already prepared.
For development purposes, you can start the game on your own already without the requirenment of having another player in the lobby. Later this will of course have to change, but that is way in the future for now.
Prototype Gameplay Components
The implementation of this projects starts with prototyping core features of the game. Most of the aspects that a gameplay object (e.g. units or buildings) will be handled by different components, meaning a normal building could be easily upgraded to generate resources or a unit spawner can be downgraded to just a building by just removing or adding the specific component.
Here are some of the basic components that are available:
- Building
- UnitBase
- UnitSpawner
- ResourceGenerator
- ResourceBank
- UnitFiring
- UnitMovement
- Health
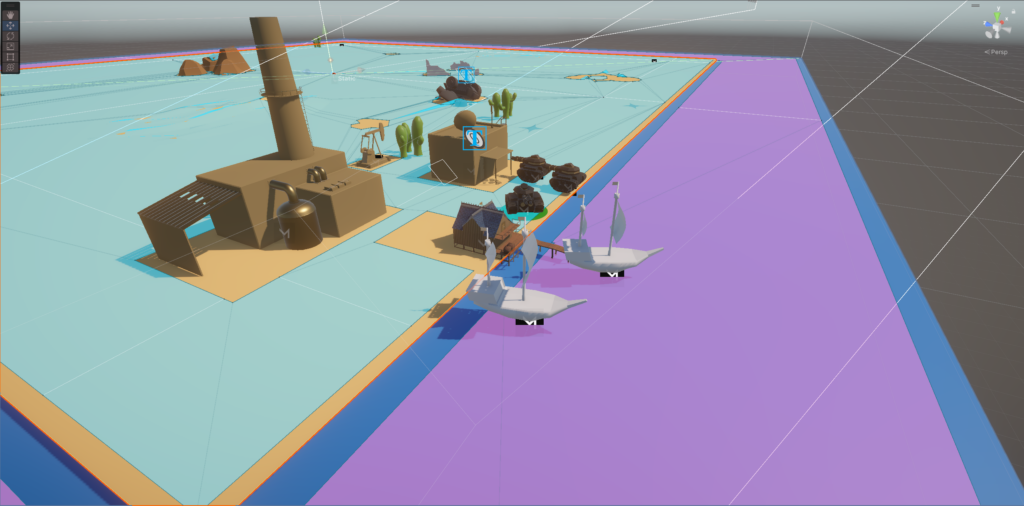
Land and Water movement
As building ships, moving units and conquering other islands is one of the key features for this project, we began to implement the different moving behaviors early. As you may know, a ship usually cant walk on land – and most humanoid units cant swim miles to the next island. So in order to be able to strictly seperate this movement, multiple NavMeshes need to be created. Following this concept, this means that UnitSpawners like boatyard will spawn units on the closest available point at the water base NavMesh. This makes sure the ship can move on the correct NavMesh right from the start.
Units and Buildings
The most important part in an RTS-Game is of course managing and commanding your units and buildings. We have already implemented the basic logic behind this by having these points dealt with:
- Creating new buildings has checks in place that make sure you are allowed to place them at the desired spot. This includes:
- Check for enough resources for the building
- Check for other friendly buildings nearby
- Check for collision
- In case of resource generators: Check for the needed resource nearby
- Check if water is nearby, in case of the water buildings like shipyards or fisherman
- The UnitSpawner building is in charge of creating new units. Depending on which unit this spawner is managing, it has checks to make sure everything works correctly:
- Has the player enough resources in his bank to create this unit?
- Is the Queue for the units already full? (e.g. you cant build too many units at the same time)
When the units are spawned, you can either select them seperately or using a selection box. All units currently in the selection box will listen to the input of the player that owns them. Clicking somewhere on the ground that has a NavMesh will tell them to move to this point, clicking on an enemy unit or building will command them to move towards that object and attack it when they are close enough.
Version 0.2
Camera Controlls
Though already available in the first version, the improvement of the camera controlls was the top priority of the new version. It was very annoying to have a “bad” camera for the testing we already did and that was to come. So the new features of the camera will make our life easier.
Aside from the basic movement with the WASD and Arrow keys, the camera can also be moved by rightclick and drag, putting the cursor to the edge of the screen and clicking on the minimap.
The rotation of the camera is handled by clicking the mouse wheel, pressing the Ctrl key during that will allow you to change the pitch of the camera in respect to the target object of the camera. And of course the zoom function on the mouse scroolwheel.
Grid System
We wanted to improve the placement system with a grid. At first we started to use the grid system that comes packaged with Unity. It was easy enough to set up and had some options that makes it easy to use:
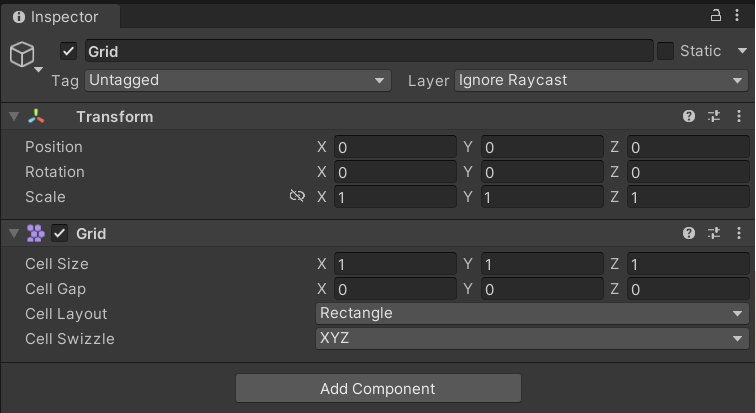
As we only wanted to use rectangular cells and we already started to use some placeholder models that stick to the one unity unit dimensions, we didnt have to touch any of the default settings here.
The functions this component provides, also helped us to make the snapping to the individual cells by converting the position of the mouse into a position of the cell the mouse is currently over, using the ScreenPointToRay cast:
///Shoot a ray from the Camera towards the mouse position on the screen and return the hit point if it hits something on the specified layer
Ray ray = Camera.main.ScreenPointToRay(Mouse.current.position.ReadValue());
if(!Physics.Raycast(ray, out RaycastHit hit, 100, placementLayerMask))
{
	return;
}

///Set the position of a temporary mouseIndicator to that hit position
mouseIndicator.transform.position = hit.point;

///Convert the hit position to a specific cell in the world and place a cellIndicator on that cell position, leaving the Y axis to the hit point which is just the ground height
Vector3 cellIndicatorPosition = grid.CellToWorld(Vector3Int.FloorToInt(hit.point));
cellIndicator.transform.position = new Vector3(cellIndicatorPosition.x, mouseIndicator.transform.position.y, cellIndicatorPosition.z);
We also wanted to show the player the grid when he is trying to place something, just so he has a reference of the cells. We had the choice between adding a mesh for each of the cells or to use a shader that generates the borders of the cells. As the first choice would mean that we had to generate new vertices for the meshes, we decided to use the shader route.
Following a tutorial from Sunny Valley Studios on youtube we created the shader with Unitys shader graph like so:
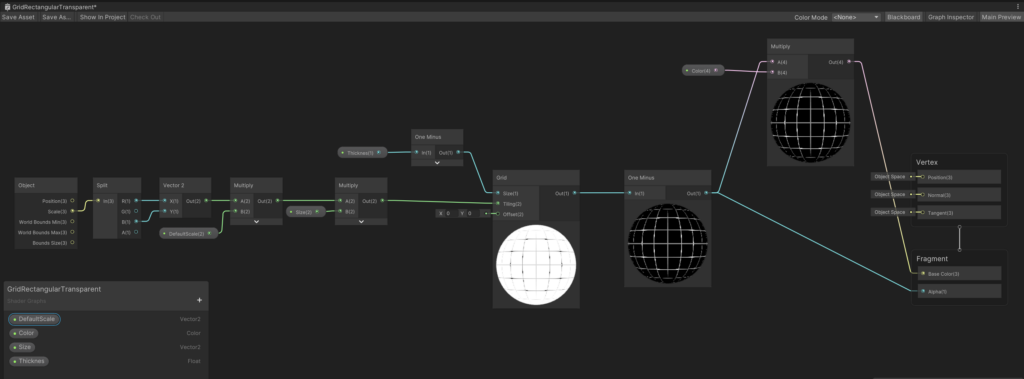
Adding a plane somewhere in the scene a little above the ground and adding this shader to the plane will show us a nice grid of cells on the ground, having options to change the size and scale of the cells and the color and thicknes of the borders:
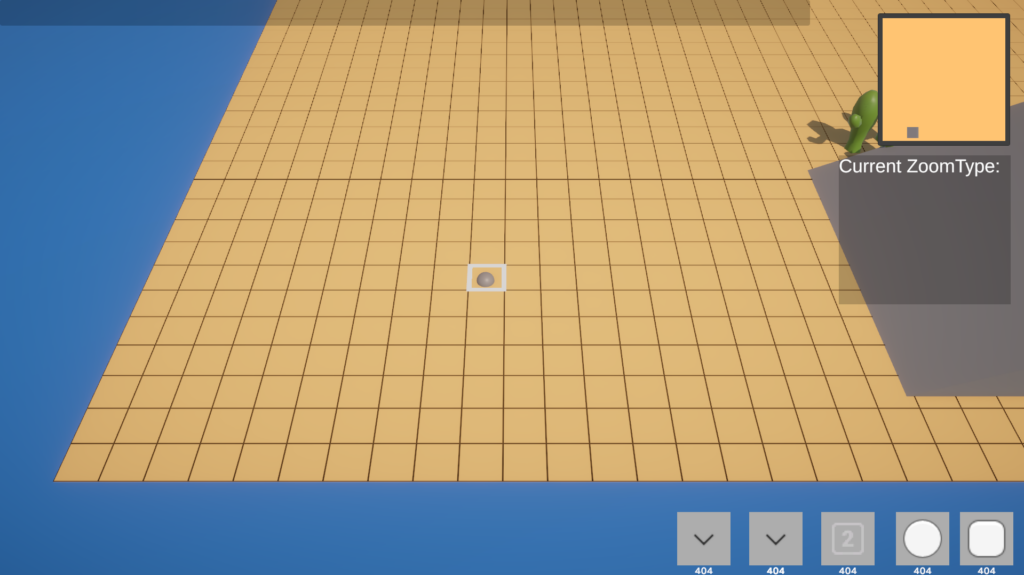
There was not that much that had to be changed for the positioning of new buildings, as they already were snapped to the mouse position during the placement process. Now they just had to be snapped to the position of the cell indicator:
buildingPreview.transform.position = cellIndicator.transform.position;
buildingPreview.transform.rotation = Quaternion.FromToRotation(Vector3.up, hit.normal);
To round things up, we also added a check for the angle of the placement, blocking it if the ground is too steep.
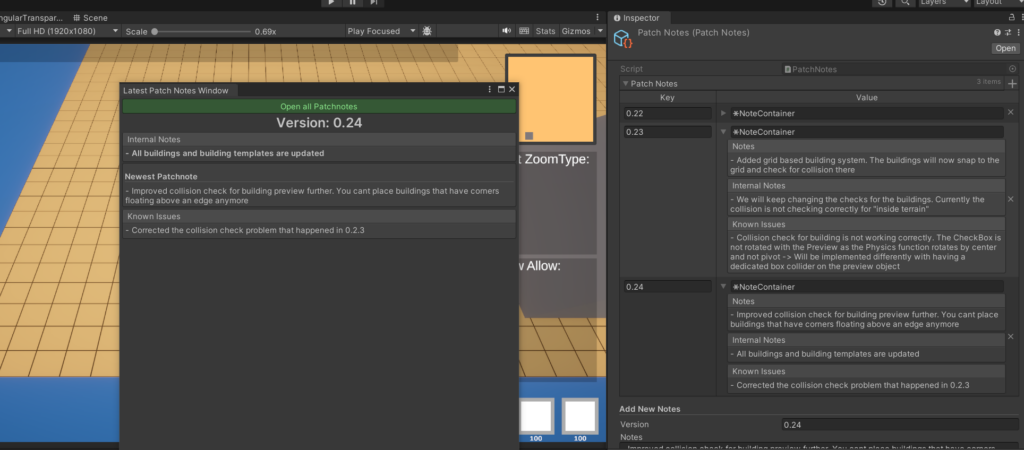
Patchnotes
To finish of this version, we created a basic patchnotes system, in which we started to create notes starting with version 0.2. This wont have any influence on the game right now, but will later be available in game so we can show the changes to the players. For internal purposes these patchnotes also include internal notes and known issues, which are shown on project startup: